
Building web3 social app on Solana
Detailed tutorial on how to build a web3 Image sharing Platform on Spling Protocol (Solana) using ReactJS


Web3 is fun, and it's even more enjoyable when you can use the Web3 version of your favorite Web2 apps. In January 2023, the Solana Sandstorm Hackathon began, featuring over 50 tracks to build apps on. I chose to participate in the Web3 Social Apps track, specifically on Spling Protocol. After brainstorming, I decided to build a social media platform combining features from Instagram and Pinterest using the Spling Protocol. Spling is a social layer protocol built on the Solana blockchain that simplifies the process of building Web3 social apps without requiring complex smart contracts in Rust. This means that developers can build Web3 social apps on Solana using familiar Web2 technology stacks.
During my first attempt at using the Spling SDK, I encountered several issues. However, thanks to the support provided on the Spling Discord, I was able to quickly receive technical assistance and resolve my problems.
The decided tech stack of my project was React and TailwindCSS though I would recommend using NextJS for server-side rendering and better SEO of user-generated content. Now let's dive into the technical side of things and get our hands dirty on Spling. Make sure to take references from this open-source repository of Solpin on Github. This blog is about Spling Protocol and less about React and other techs so make sure to take help from the code repository if you encounter some non-Spling errors in your app.
Setting up a starter react App with Solana Wallet Login:
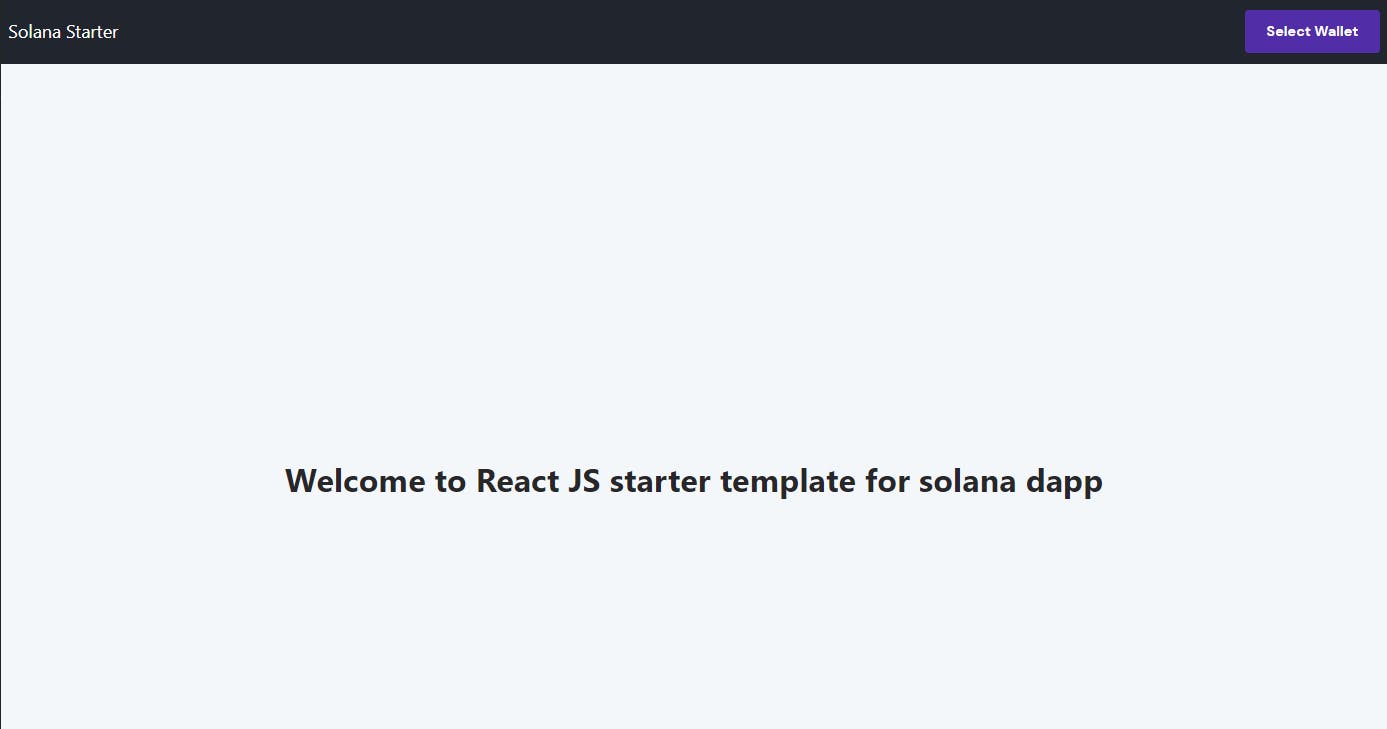
I have created a starter template for ReactJS app that has solana login already. Clone this repo and run it. For the tutorials ahead, I will be using the same template. This is how it will look in the beginning:
One thing to notice in the starter template is that it uses react-app-rewired (see "scripts" in package.json ) as we have a custom config-overrides.js file in our project's root directory that fixes some dependency issues.
Installing Spling SDK to the Starter App
For Solpin I used "@spling/social-protocol": "^1.5.4" version of the Spling SDK. Make sure to install the Spling SDK with --no-optional flag like npm install @spling/social-protocol --no-optional to only include required files for React.
About Spling and Spling SDK
Spling is built on Solana Blockchain and uses Shadow Drive for storing content. Spling SDK enables developers to build social apps on Solana using web2 technology. Every activity on Spling Protocol is a blockchain transaction and hence there is a need for gas fee. The gas fee can be paid either by end user or by the app itself making everything gasless for the end user. Spling SDK allows for both options. In this tutorial we will just go for non-gasless way where the user himself will pay the gas for all transactions. Only that one has to make sure that the user wallet has enough $SOL and $SHDW tokens in his wallet. One can easily exchange some $SHDW tokens here
Workflow while using and building Spling Apps
For a user to use Spling, they must have an account on Spling Protocol. The frontend app should have a logic where the app checks if a Solana wallet already has a spling account. If the user doesn't have Spling account the app should route to /sign-up where the user can create their profile. Having a profile is must for all write actions on Spling.
If the user has a Spling account, they can do all write actions like createPost() etc. All posts can be made only inside a group. A group (or groupID) is usually created by the developer himself denoting their appID where a user can make posts. It is through the groupID one can read all posts and contents. As of now, a wallet can create only one group. Everything on Spling can be hidden using delete functions making it invisible for frontends. This is how deletion works in Spling. You can read the developer docs of Spling here. Now let's dive into the steps of making a complete Spling app.
Making our first app on Spling
1. Creating /sign-up page
In the previously mentioned starter template, create a utils folder in /src that has two files named constants.js and functions.js .
Constant.js has configuration for Spling SDK and it looks like this:
export const protocolOptions = {
  useIndexer: true,
  rpcUrl:
    "YOUR RPC PROVIDER",
};
You can get your RPC provider URL for free at helius.xyz.
The functions.js has some utility functions that we will use later in our app. Function.js:
export const convertBase64 = (file) => {
  return new Promise((resolve, reject) => {
    const fileReader = new FileReader();
    fileReader.readAsDataURL(file);
    fileReader.onload = () => {
      resolve(fileReader.result);
    };
    fileReader.onerror = (error) => {
      reject(error);
    };
  });
};

export function timeStampToTimeAgo(p_timeStampNanoSeconds) {
  const milliseconds = p_timeStampNanoSeconds / 1000000;
  const durationUntilNowInMilliseconds = new Date().getTime() - milliseconds;
  const durationInMinutes = durationUntilNowInMilliseconds / 1000 / 60;
  if (durationInMinutes < 60) return Math.floor(durationInMinutes) + "m";
  const durationInHours = durationInMinutes / 60;
  if (durationInHours < 24) return Math.floor(durationInHours) + "h";
  const durationInDays = durationInHours / 24;
  return Math.floor(durationInDays) + "d";
}
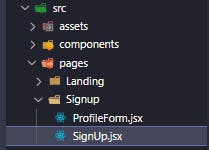
Now create a new folder named Signup in /src/pages/. In the Signup folder create two files named ProfileForm.jsx and SignUp.jsx
This is how ProfileForm.jsx should look like:
import React, { useState, useEffect } from "react";
import toast, { Toaster } from "react-hot-toast";
import { useNavigate } from "react-router-dom";
import { BiUpload } from "react-icons/bi";
import default_profile_pic from "../../assets/default_profile_pic.png";
import { useWallet } from "@solana/wallet-adapter-react";
import { SocialProtocol } from "@spling/social-protocol";
import { convertBase64 } from "../../utils/functions";
import { protocolOptions } from "../../utils/constants";
import banner from "../../assets/banner.jpg";
export default function ProfileForm() {
  const navigate = useNavigate();
  const [profileImage, setProfileImage] = useState(default_profile_pic);
  const [profileImageFile, setProfileImageFile] = useState(null);
  const [loading, setLoading] = useState(false);
  const [username, setUsername] = useState("");
  const [profileDescription, setProfileDescription] = useState("");
  const [isUploadingProfilePic, setIsUploadingProfilePic] = useState(false);
  const [socialProtocol, setSocialProtocol] = useState(null);
  const fileInput = React.useRef(null);
  const wallet = useWallet();
  useEffect(() => {
    async function initApp() {
      const socialProtocolVal = await new SocialProtocol(
        wallet,
        null,
        protocolOptions
      ).init();
      setSocialProtocol(socialProtocolVal);
    }
    if (wallet?.publicKey && typeof wallet !== "undefined") {
      initApp();
    }
  }, [wallet]);
  const updateProfile = async () => {
    if (!wallet || typeof wallet == "undefined")
      return toast.error("Wallet not connected");
    if (!username) return toast.error("Please enter a username");
    if (!profileImageFile) return toast.error("Please upload a profile image");
    if (!profileDescription)
      return toast.error("Please enter a profile description");

    const toastID = toast.loading(
      "Creating your profile. This may take a while..."
    );
    try {
      let bs64 = await convertBase64(profileImageFile);
      let finalObj = {
        base64: bs64,
        size: profileImageFile.size,
        type: profileImageFile.type,
      };
      const user = await socialProtocol.createUser(
        username,
        finalObj,
        profileDescription
      );
      if (user) {
        toast.dismiss(toastID);
        toast.success("Profile created successfully");
        //after 2 seconds redirect to home
        setTimeout(() => {
          navigate("/");
        }, 2000);
      } else {
        toast.dismiss(toastID);
        toast.error("Something went wrong");
      }
    } catch (err) {
      console.log(err);
      toast.dismiss(toastID);
      toast.error("Something went wrong. Please Try again..");
    }
  };
  const handleUsernameChange = (e) => {
    setUsername(e.target.value);
  };
  const handleProfilePicUpload = async () => {
    //store the file in the state
    const file = fileInput.current.files[0];
    if (!file) return toast.error("Please select a file");
    if (file.size > 1000000) return toast.error("File size too large");
    if (!file.type.includes("image"))
      return toast.error("Please upload an image file");
    setProfileImage(URL.createObjectURL(file));
    console.log(file);
    setProfileImageFile(file);
  };
  return (
    <div className='flex   mx-auto  justify-center items-start w-full md:w-2/3 mb-24'>
      <Toaster />
      <div className='flex mx-auto  w-full space-y-6 md:flex-row md:space-x-10 md:space-y-0'>
        <div className='flex mx-auto flex-col w-full md:w-3/4 secondaryBg border secondaryBorder rounded-xl p-4'>
          <div
            style={{
              backgroundImage: `url(${banner})`,
              backgroundPosition: "center",
              backgroundSize: "cover",
              backgroundRepeat: "no-repeat",
            }}
            className='rounded-lg w-full h-40 md:h-64 relative flex justify-center items-center dark:border-[#2D2D33] border-gray-100 border z-20 '>
            <div className='flex  -bottom-12 left-auto absolute items-center'>
              <div
                className='w-24 h-24 my-2 group rounded-full relative z-20 flex items-center justify-center dark:border-[#2D2D33] border-white border-2'
                id='profilePicOnSignUp'
                style={{
                  backgroundImage: `url(${profileImage})`,
                  backgroundPosition: "center",
                  backgroundSize: "cover",
                  backgroundRepeat: "no-repeat",
                }}>
                <button
                  className='bg-white/[.7]  group-hover:flex rounded-full px-2 py-2 hover:bg-white/[.9]'
                  onClick={() => {
                    fileInput.current.click();
                  }}>
                  <input
                    ref={fileInput}
                    type='file'
                    accept='image/*'
                    onChange={handleProfilePicUpload}
                    style={{ display: "none" }}
                  />
                  <BiUpload size={24} />
                </button>
              </div>
            </div>
          </div>
          <div className='flex flex-col mt-10 pt-5 w-full space-y-4 items-center'>
            <div className='w-full md:w-3/5'>
              <p className='font-semibold mb-2 primaryTextColor'>Username</p>
              <input
                type='text'
                value={username}
                onChange={handleUsernameChange}
                placeholder='GavinBelson'
                className='search rounded-full darkenBg darkenBorder border darkenHoverBg px-3 py-2 w-full outline-none focus:shadow transition delay-50 placeholder:text-gray-400 dark:placeholder:text-gray-500'
              />
            </div>
            <div className='w-full md:w-3/5'>
              <p className='font-semibold mb-2 primaryTextColor'>Description</p>
              <textarea
                placeholder='CEO OF HOOLI'
                className='search rounded-xl darkenBg darkenBorder border darkenHoverBg h-32 px-3 py-2 w-full outline-none focus:shadow transition delay-50 placeholder:text-gray-400 dark:placeholder:text-gray-500'
                value={profileDescription}
                onChange={(e) =>
                  setProfileDescription(e.target.value)
                }></textarea>
            </div>

            <div className='mx-auto'>
              <button
                onClick={() => updateProfile()}
                className={` flex items-center justify-center space-x-2 font-medium text-white px-6 py-3 leading-none rounded-full buttonBG my-2 ${
                  loading ? "cursor-not-allowed bg-opacity-50" : ""
                }`}>
                <span>Create Profile</span>
              </button>
            </div>
          </div>
        </div>
      </div>
    </div>
  );
}
The above code might look overwhelming but you don't need to worry as most of it is there for nicely handling exceptions and errors. Just know that we are taking three things from the user:
Username
Profile Description
Profile Photo
and using these three entities we are creating user profile on Spling. The useEffect() function runs when the user has logged in with Solana wallet and initializes the SDK with wallet and protocolOptions which we had defined in constants.js . The updateProfile() function is where everything is happening. We first need to convert the selected user image into base64 format using the convertBase64() function we had defined in functions.js file. After having everything we just call the createUser() function of spling object. You can also pass Metadata that can include more info about the profile.
Now let's just import the ProfileForm.jsx component in SignUp.jsx and create a new route in App.jsx to test things out.
This is how SignUp.jsx looks like:
import React from "react";
import Navbar from "../../components/Navbar";
import ProfileForm from "./ProfileForm";
export default function SignUp() {
  return (
    <div>
      <Navbar shouldShowWallet={true} />
      <div className='flex justify-center mx-auto'>
        <div>
          <div className='relative text-3xl md:py-10 text-gray-800 text-center font-extrabold  sm:text-5xl lg:text-4xl  rounded-full sm:w-[70%] flex justify-center mx-auto px-2 '>
            <span className='brandGradientBg blur-2xl filter opacity-10 w-full h-full absolute inset-0 rounded-full leading-snug'></span>
            <span className='md:px-5 leading-snug'>
              Create your profile to get started.
            </span>
          </div>
          <div className='flex justify-center mx-auto px-2 '>
            <div className='bg-yellow-200 px-4 py-1 border-l-2 mb-4 mt-3 border-yellow-500'>
              Make sure you have enough $SOL and $SHDW tokens in your wallet to
              cover the gas fee.
              <br></br>
              You can buy some $SHDW tokens from{" "}
              <a
                href='https://jup.ag/swap/SOL-SHDW'
                target={"_blank"}
                className='text-blue-400 underline'>
                here
              </a>
            </div>
          </div>
        </div>
      </div>
      <div className='mb-10'>
        <ProfileForm />
      </div>
    </div>
  );
}
And after creating the /sign-up route, this is how App.jsx looks like
import React from "react";
import "./App.css";
import "./styles/styles.css";
import { BrowserRouter, Route, Routes } from "react-router-dom";
import WalletContextProvider from "./components/walletContextProvider";
import LandingPage from "./pages/Landing/LandingPage";
import SignUp from "./pages/Signup/SignUp";
function App() {
  return (
    <WalletContextProvider>
      <BrowserRouter>
        <Routes>
          <Route path='/' element={<LandingPage />} />
          <Route path='/sign-up' element={<SignUp />} />
        </Routes>
      </BrowserRouter>
    </WalletContextProvider>
  );
}

export default App;
```
Compile everything, run and go at http://localhost:3000/sign-up to see this beautiful sign up page

Let's test the sign up page and see if our profile is created. After filling the sing-up form and hitting "Create Profile" button, it turns out that everything is working as intended!
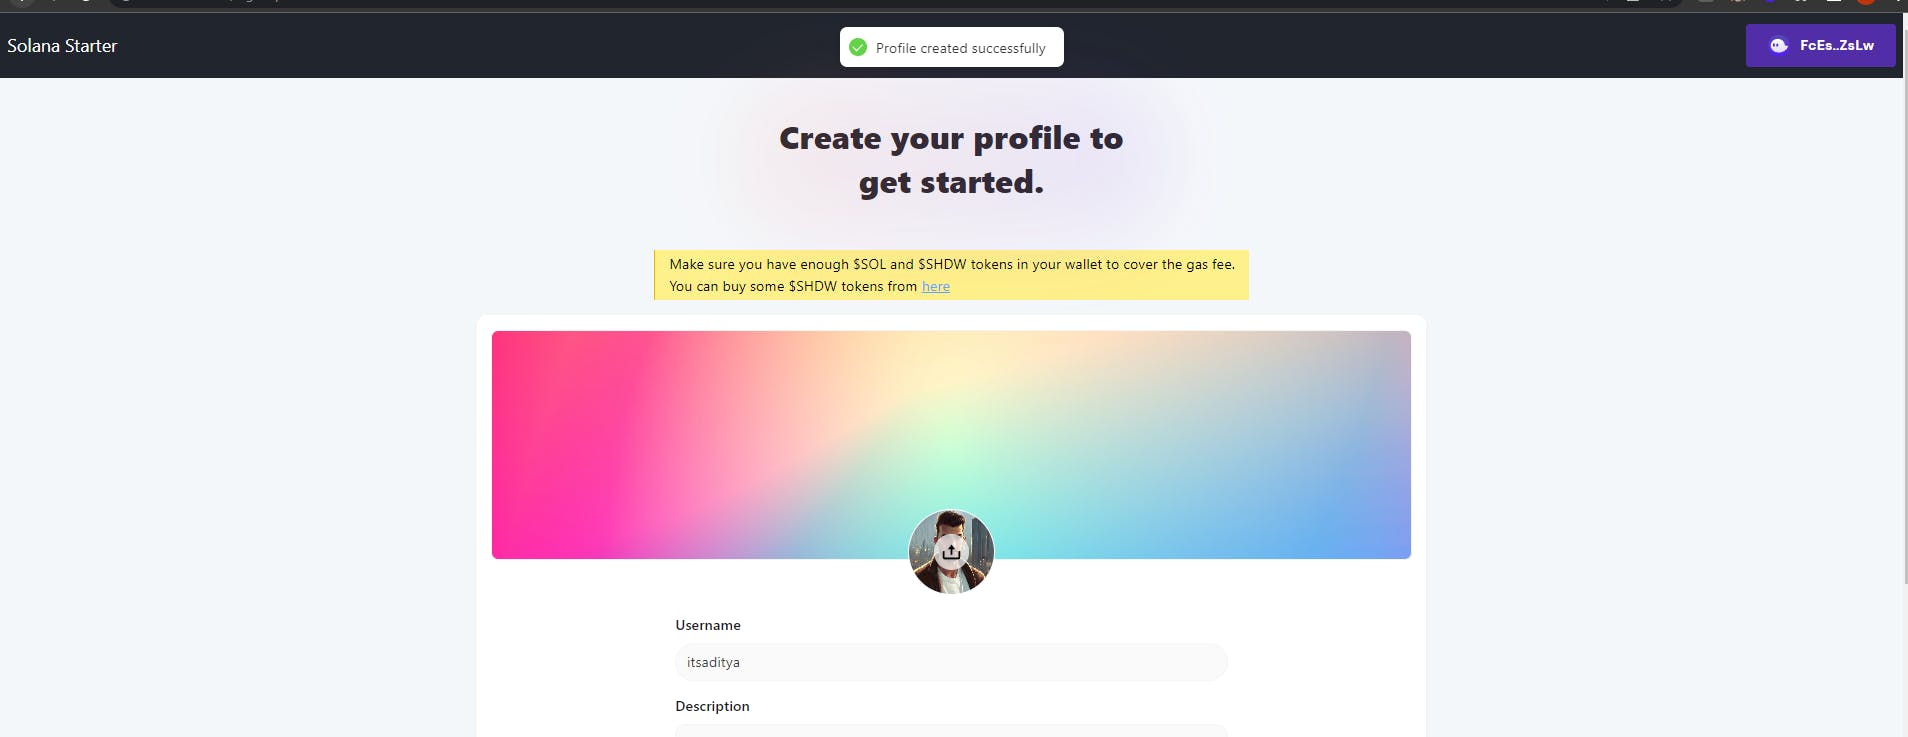
Congratulations 🥳🥳🥳. You just did your first Spling Transaction in your own web3 social Dapp.
2. Making /create-group page to create our app's group
As mentioned before, a group is needed for an app so that the user can make post. Let's create a simple UI so that we the developers can create and delete group for quick testing.
Note that user has nothing to do with group creation. It's the work of the developer to create group for the user.
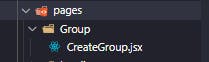
Create CreateGroup.jsx file in /pages/Group/ directory
This is how CreateGroup.jsx file looks like:
import React, { useState, useEffect } from "react";
import toast, { Toaster } from "react-hot-toast";
import { useWallet } from "@solana/wallet-adapter-react";
import { SocialProtocol } from "@spling/social-protocol";
import Navbar from "../../components/Navbar";
import { protocolOptions } from "../../utils/constants";
function CreateGroup() {
  const [socialProtocol, setSocialProtocol] = useState(null);
  const [group, setGroup] = useState(null);
  const wallet = useWallet();
  useEffect(() => {
    async function initApp() {
      const socialProtocolVal = await new SocialProtocol(
        wallet,
        null,
        protocolOptions
      ).init();
      setSocialProtocol(socialProtocolVal);
    }
    if (wallet?.publicKey && typeof wallet !== "undefined") {
      initApp();
    }
  }, [wallet]);

  const createGroup = async () => {
    if (!wallet || typeof wallet == "undefined")
      return toast.error("Wallet not connected");
    if (!socialProtocol) return toast.error("Wallet not connected");
    const loadingToast = toast.loading("Creating Group");
    const group = await socialProtocol.createGroup(
      "Test Group",
      "We are just testing out Spling",
      null
    );
    toast.dismiss(loadingToast);
    const groupID = group.groupId;
    setGroup(groupID);
    toast.success("Group Created");
    console.log(group);
  };

  const deleteGroup = async () => {
    if (!wallet || typeof wallet == "undefined")
      return toast.error("Wallet not connected");
    if (!socialProtocol) return toast.error("Wallet not connected");
    const loadingToast = toast.loading("Deleting Group");
    const group = await socialProtocol.deleteGroup();
    toast.dismiss(loadingToast);
    toast.success("Group Deleted");
    console.log(group);
  };

  return (
    <div>
      <Navbar shouldShowWallet={true} />
      <div className='flex   mx-auto  justify-center items-start w-full md:w-2/3 mb-24'>
        <Toaster />
        <div className='flex mx-auto  w-full space-y-6 md:flex-row md:space-x-10 md:space-y-0 my-28'>
          <div className='mx-auto flex justify-center items-center flex-col'>
            <h1 className='text-xl text-red-400'>
              This will create a test group
            </h1>

            <h1 className='text-xl text-green-400'>
              {group ? `Group ID: ${group}` : null}
            </h1>
            <button
              onClick={() => createGroup()}
              className=' flex items-center justify-center space-x-2 font-medium text-white px-6 py-3 leading-none rounded-full buttonBG my-2'>
              <span>Create Group</span>
            </button>
            <button
              onClick={() => deleteGroup()}
              className='flex items-center justify-center space-x-2 font-medium text-white px-6 py-3 leading-none rounded-full buttonBG my-2'>
              <span>Delete Group</span>
            </button>
          </div>
        </div>
      </div>
    </div>
  );
}

export default CreateGroup;
Note that apart from making a group creation function the code also has function for group deleting for easy testing. The SDK initialization and login process is same as explained before. The createGroup() function of Spling SDK takes 4 arguments:
Name of Group
Description of Group
Profile picture of Group (we have set it null in our case)
Metadata (for extra data if we need)
Our Group's name is Test Group and it's description is We are just testing out Spling. The deleteGroup() function automatically detects and deletes the group with which your wallet is associated with as a wallet can create only one group.
Let's add /admin route for our in App.jsx and test things out.
App.jsx will then look like:
import React from "react";
import "./App.css";
import "./styles/styles.css";
import { BrowserRouter, Route, Routes } from "react-router-dom";
import WalletContextProvider from "./components/walletContextProvider";
import LandingPage from "./pages/Landing/LandingPage";
import SignUp from "./pages/Signup/SignUp";
function App() {
  return (
    <WalletContextProvider>
      <BrowserRouter>
        <Routes>
          <Route path='/' element={<LandingPage />} />
          <Route path='/sign-up' element={<SignUp />} />
          <Route path='/admin' element={<SignUp />} />
        </Routes>
      </BrowserRouter>
    </WalletContextProvider>
  );
}

export default App;
We can now see the admin panel at http://localhost:3000/admin and it looks like this:
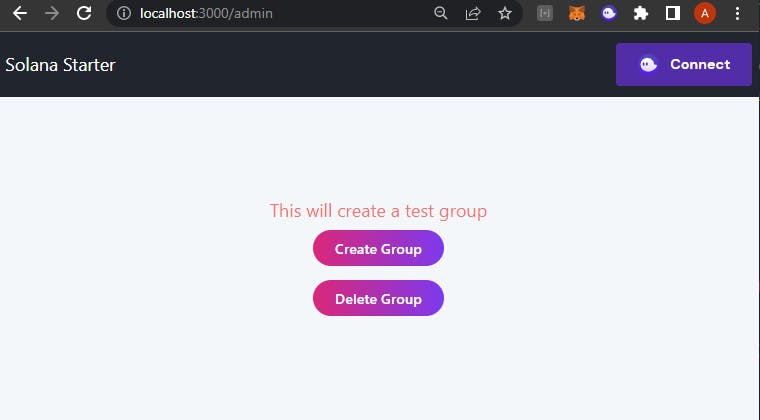
Let's just hit create group and see what happens.
As you can see we have successfully created our group on Spling and it's ID is 31. Note down this ID number as it will be used later on while making and fetching posts.
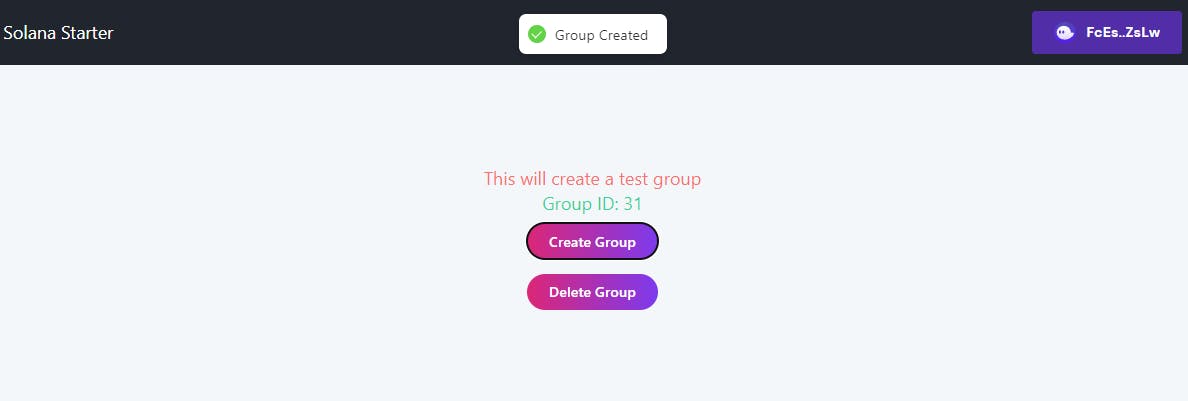
You can delete the group and try re-creating if you want to play around.
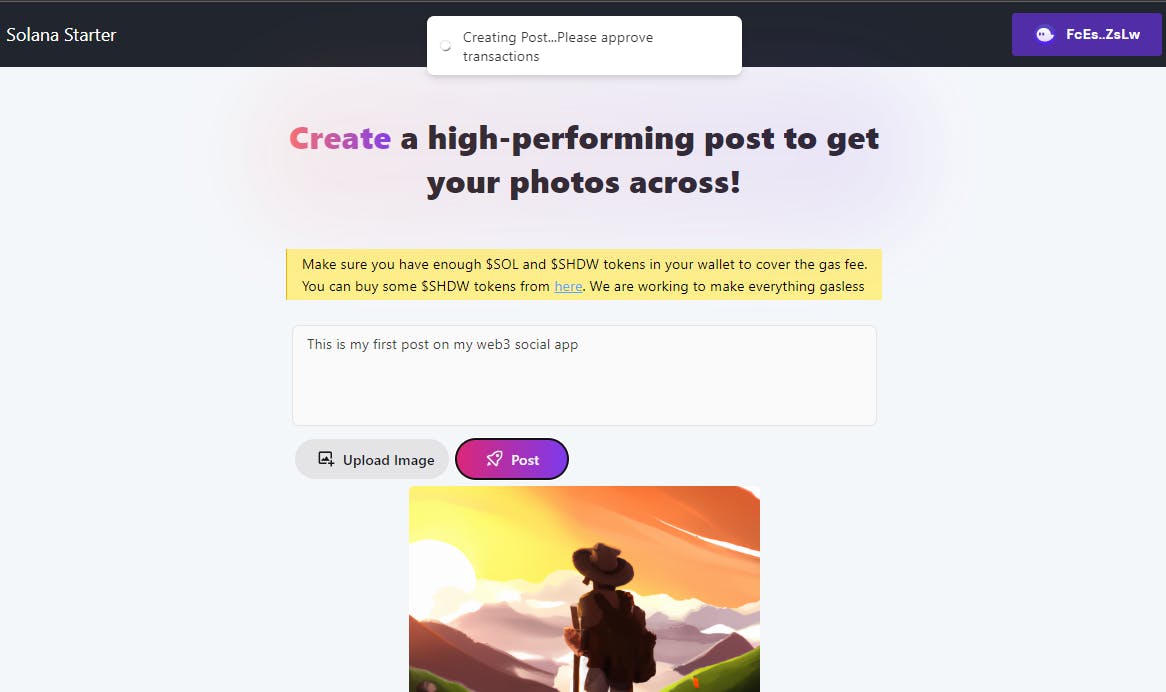
3. Making /create page to make Post in our App Group
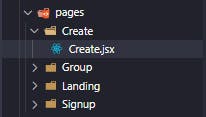
/create page is where the user will be able to post images on our platform. Create a new file named Create.jsx in /src/pages/Create/
The Create.jsx file looks like this:
import React, { useEffect, useRef, useState, useContext } from "react";
import { BiImageAdd, BiRocket } from "react-icons/bi";
import { BsTrash } from "react-icons/bs";
import toast, { Toaster } from "react-hot-toast";

import { useWallet } from "@solana/wallet-adapter-react";
import { SocialProtocol } from "@spling/social-protocol";
import { convertBase64 } from "../../utils/functions";
import { Link } from "react-router-dom";
import Navbar from "../../components/Navbar";
import { protocolOptions } from "../../utils/constants";
export default function Create() {
  const [socialProtocol, setSocialProtocol] = useState(null);
  const { publicKey } = useWallet();
  const [postBody, setPostBody] = useState("");
  const fileInput = React.useRef(null);
  const [imageURL, setImageURL] = useState("");
  const [imageFile, setImageFile] = useState(null);
  const [postCreationDone, setPostCreationDone] = useState(false);
  const wallet = useWallet();
  useEffect(() => {
    async function initApp() {
      const socialProtocolVal = await new SocialProtocol(
        wallet,
        null,
        protocolOptions
      ).init();
      setSocialProtocol(socialProtocolVal);
    }
    if (wallet?.publicKey && typeof wallet !== "undefined") initApp();
  }, [wallet]);

  const handleImageUpload = async (file) => {
    try {
      if (!wallet?.publicKey) {
        toast.error("Please connect wallet first");
        fileInput.current.value = null;
        return;
      }
      const file = fileInput.current.files[0];
      if (file.size > 10000000) return toast.error("File size too large");
      if (!file.type.includes("image"))
        return toast.error("Please upload an image file");
      setImageURL(URL.createObjectURL(file));
      setImageFile(file);
    } catch (e) {
      toast.error("Error uploading Image");
      console.log(e);
    }
  };
  const submitPost = async () => {
    if (!wallet?.publicKey || typeof wallet == "undefined")
      return toast.error("Wallet not connected");
    if (!imageFile) return toast.error("Please upload an image file");
    if (!postBody) return toast.error("Please enter a Image Details.");

    const toastID = toast.loading(
      "Creating Post...Please approve transactions"
    );
    try {
      let bs64 = await convertBase64(imageFile);
      let finalObj = {
        base64: bs64,
        size: imageFile.size,
        type: imageFile.type,
      };

      const post = await socialProtocol.createPost(31, postBody, "", [
        finalObj,
      ]);
      if (post) {
        toast.dismiss(toastID);
        toast.success("Post created successfully");
        setPostCreationDone(true);
        setImageFile(null);
        setImageURL("");
        setPostBody("");

        return;
      } else {
        toast.dismiss(toastID);
        toast.error("Error creating post");
        return;
      }
    } catch (e) {
      if (e.message.includes("Account does not exist")) {
        toast.dismiss(toastID);
        toast.success("Post created successfully");
        setImageFile(null);
        setImageURL("");
        setPostBody("");
        return;
      }
      toast.dismiss(toastID);
      toast.error("Error creating post");
      console.log(e);
      return;
    }
  };

  return (
    <div>
      <Navbar shouldShowWallet={true} />
      <Toaster />
      <div className='flex justify-center mx-auto'>
        <div>
          <div className='relative text-3xl md:py-10 text-gray-800 text-center font-extrabold  sm:text-5xl lg:text-4xl  rounded-full sm:w-[70%] flex justify-center mx-auto px-2 '>
            <span className='brandGradientBg blur-2xl filter opacity-10 w-full h-full absolute inset-0 rounded-full leading-snug'></span>
            <span className='md:px-5 leading-snug mt-3'>
              <span className='text-transparent bg-clip-text brandGradientBg'>
                {" "}
                Create
              </span>{" "}
              a high-performing post to get your photos across!
            </span>
          </div>
          <div className='flex justify-center mx-auto px-2 '>
            <div className='bg-yellow-200 px-4 py-1 border-l-2 mb-4 mt-3 border-yellow-500'>
              Make sure you have enough $SOL and $SHDW tokens in your wallet to
              cover the gas fee.
              <br></br>
              You can buy some $SHDW tokens from{" "}
              <a
                href='https://jup.ag/swap/SOL-SHDW'
                target={"_blank"}
                className='text-blue-400 underline'>
                here
              </a>
              . We are working to make everything gasless
            </div>
          </div>

          {postCreationDone && (
            <div className='flex justify-center mx-auto px-2 my-2'>
              <div className='bg-green-500 px-4 py-1 border-l-2 mb-4 mt-3 border-green-700 text-white'>
                View your Posts
                <Link
                  to={`/`}
                  className='text-blue-100 underline'>
                  {" "}
                  here
                </Link>
              </div>
            </div>
          )}
        </div>
      </div>
      <div className='sm:w-3/4 md:w-3/5 lg:w-1/2 mx-auto my-3 '>
        <textarea
          className='focus:ring-0 h-28 focus:outline-none outline-none darkenBg darkenHoverBg border dark:border-[#2D2D33] hover:dark:border-[#43434d] border-gray-200 hover:border-gray-200 resize-none w-full rounded-lg heading px-4 py-2'
          placeholder='About the photo...'
          value={postBody}
          onChange={(e) => setPostBody(e.target.value)}
        />

        <div className='flex items-center space-x-1'>
          <button
            className={`mx-1 flex items-center justify-center space-x-2 font-medium text-gray-800 px-4 py-3 leading-none rounded-full bg-gray-200 hover:bg-gray-300 my-2`}
            onClick={() => {
              fileInput.current.click();
            }}>
            <input
              ref={fileInput}
              type='file'
              accept='image/*'
              onChange={handleImageUpload}
              style={{ display: "none" }}
            />
            <BiImageAdd size={21} className='text-gray-900' />
            <p className='text-gray-900'>Upload Image</p>
          </button>
          <button
            className={`mx-1 flex items-center justify-center space-x-2 font-medium text-white px-8 py-3 leading-none rounded-full buttonBG my-2`}
            onClick={() => {
              submitPost();
            }}>
            <BiRocket size={21} className='text-gray-100' />
            <p className='text-gray-100'>Post</p>
          </button>
        </div>
        <div className={`${!imageURL ? "hidden" : "flex"}`}>
          <img src={imageURL} className='w-3/4 sm:w-3/5  mx-auto rounded-md' />
        </div>
        <div
          className={`${
            !imageURL
              ? " hw-3/4 sm:w-3/5 h-[60vh] bg-gray-300 mx-auto rouned-md flex justify-center items-center"
              : "hidden"
          }`}>
          <p className='text-gray-600'>
            Your Image will Appear Here after Upload
          </p>
        </div>
      </div>
    </div>
  );
}
Again, don't get overwhelmed by seeing the above code. Most of it is there for proper error handling and user responsiveness. Let's just break down things.
We take two things from the user to make post:
Post Description
Image
After the user does wallet login, we have initialized the Spling SDK in useEffect() as we have done in previous pages. The most important function in the Create.jsx file is submitPost() that calls createPost() function of the SplingSDK. We have provided three arguments to the createPost() function which are:
groupIDwhich is 31 in our casepost text
list of post image
Note that we firstly have to convert the post image to base64 format using the function we had defined in functions.js
Add the /create page route in App.jsx which will then look like:
import React from "react";
import "./App.css";
import "./styles/styles.css";
import { BrowserRouter, Route, Routes } from "react-router-dom";
import WalletContextProvider from "./components/walletContextProvider";
import LandingPage from "./pages/Landing/LandingPage";
import SignUp from "./pages/Signup/SignUp";
import CreateGroup from "./pages/Group/CreateGroup";
import Create from "./pages/Create/Create";
function App() {
  return (
    <WalletContextProvider>
      <BrowserRouter>
        <Routes>
          <Route path='/' element={<LandingPage />} />
          <Route path='/sign-up' element={<SignUp />} />
          <Route path='/admin' element={<CreateGroup />} />
          <Route path='/create' element={<Create />} />
        </Routes>
      </BrowserRouter>
    </WalletContextProvider>
  );
}

export default App;
Run the app and go to http://localhost:3000/create and you will see this post creation page:
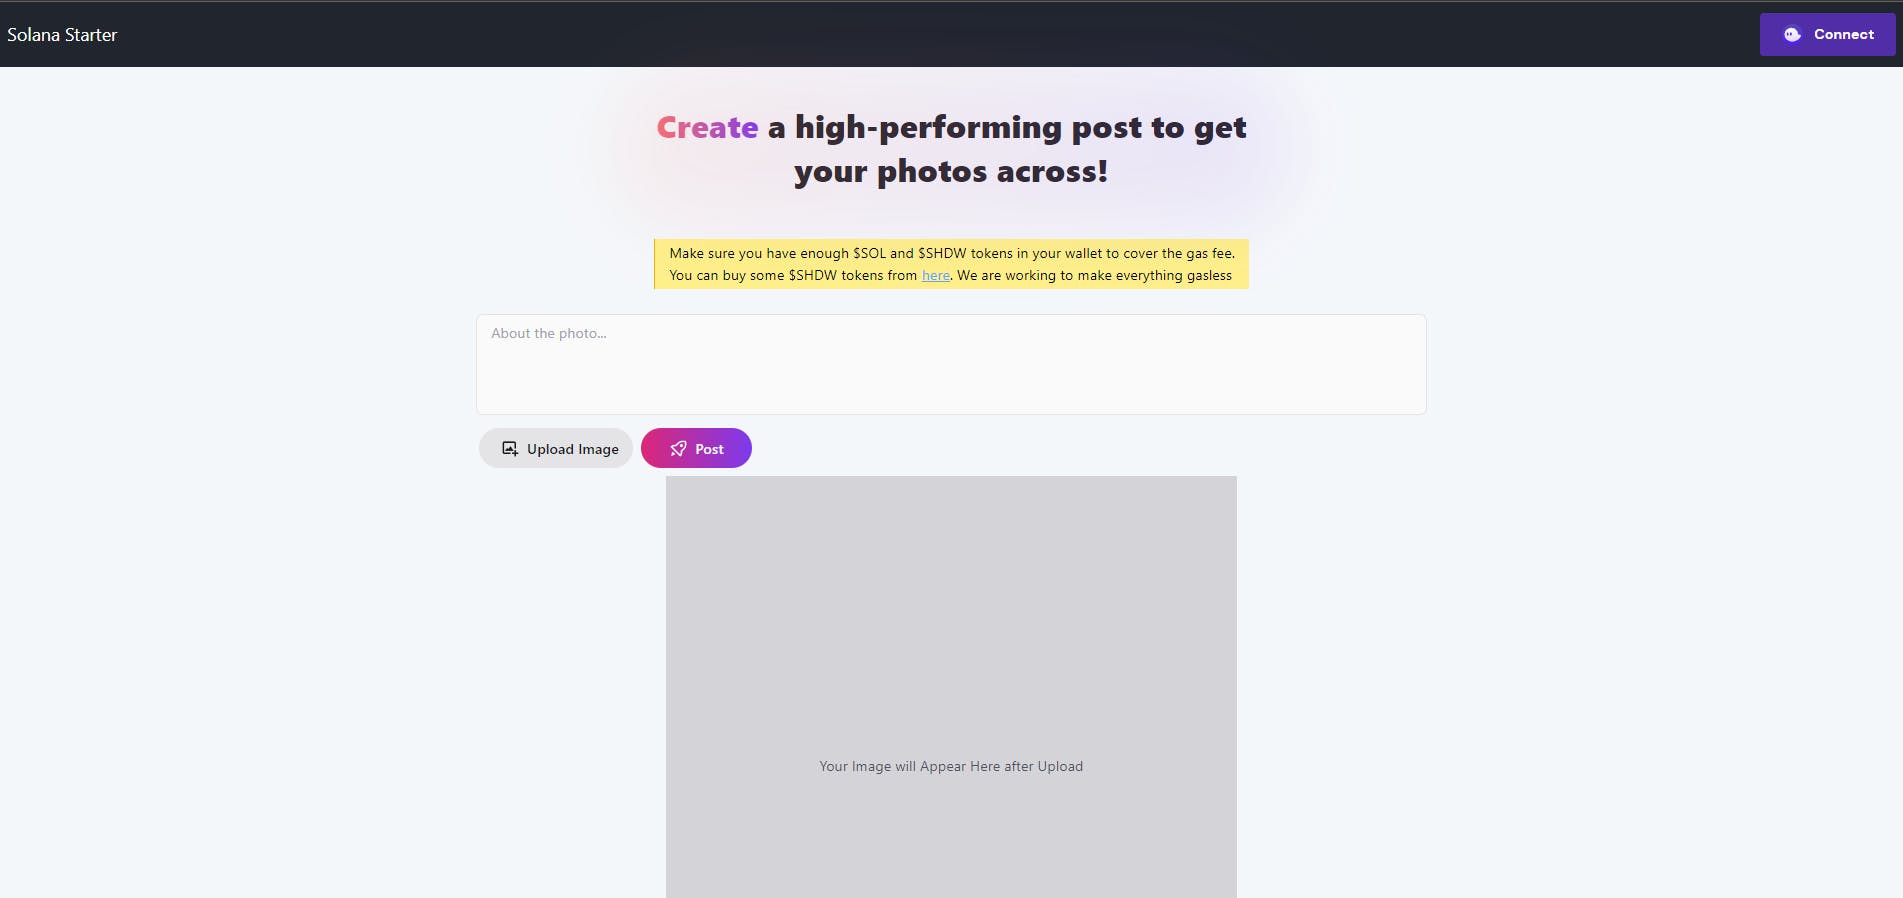
And it's time to make our first post in our own web3 social app 🚀
And on testing, it looks like our post has made to the blockchain!

Now that we have successfully created our post, it's time to show all images posted in our app on landing page with a nice Masonry Layout like this 👀
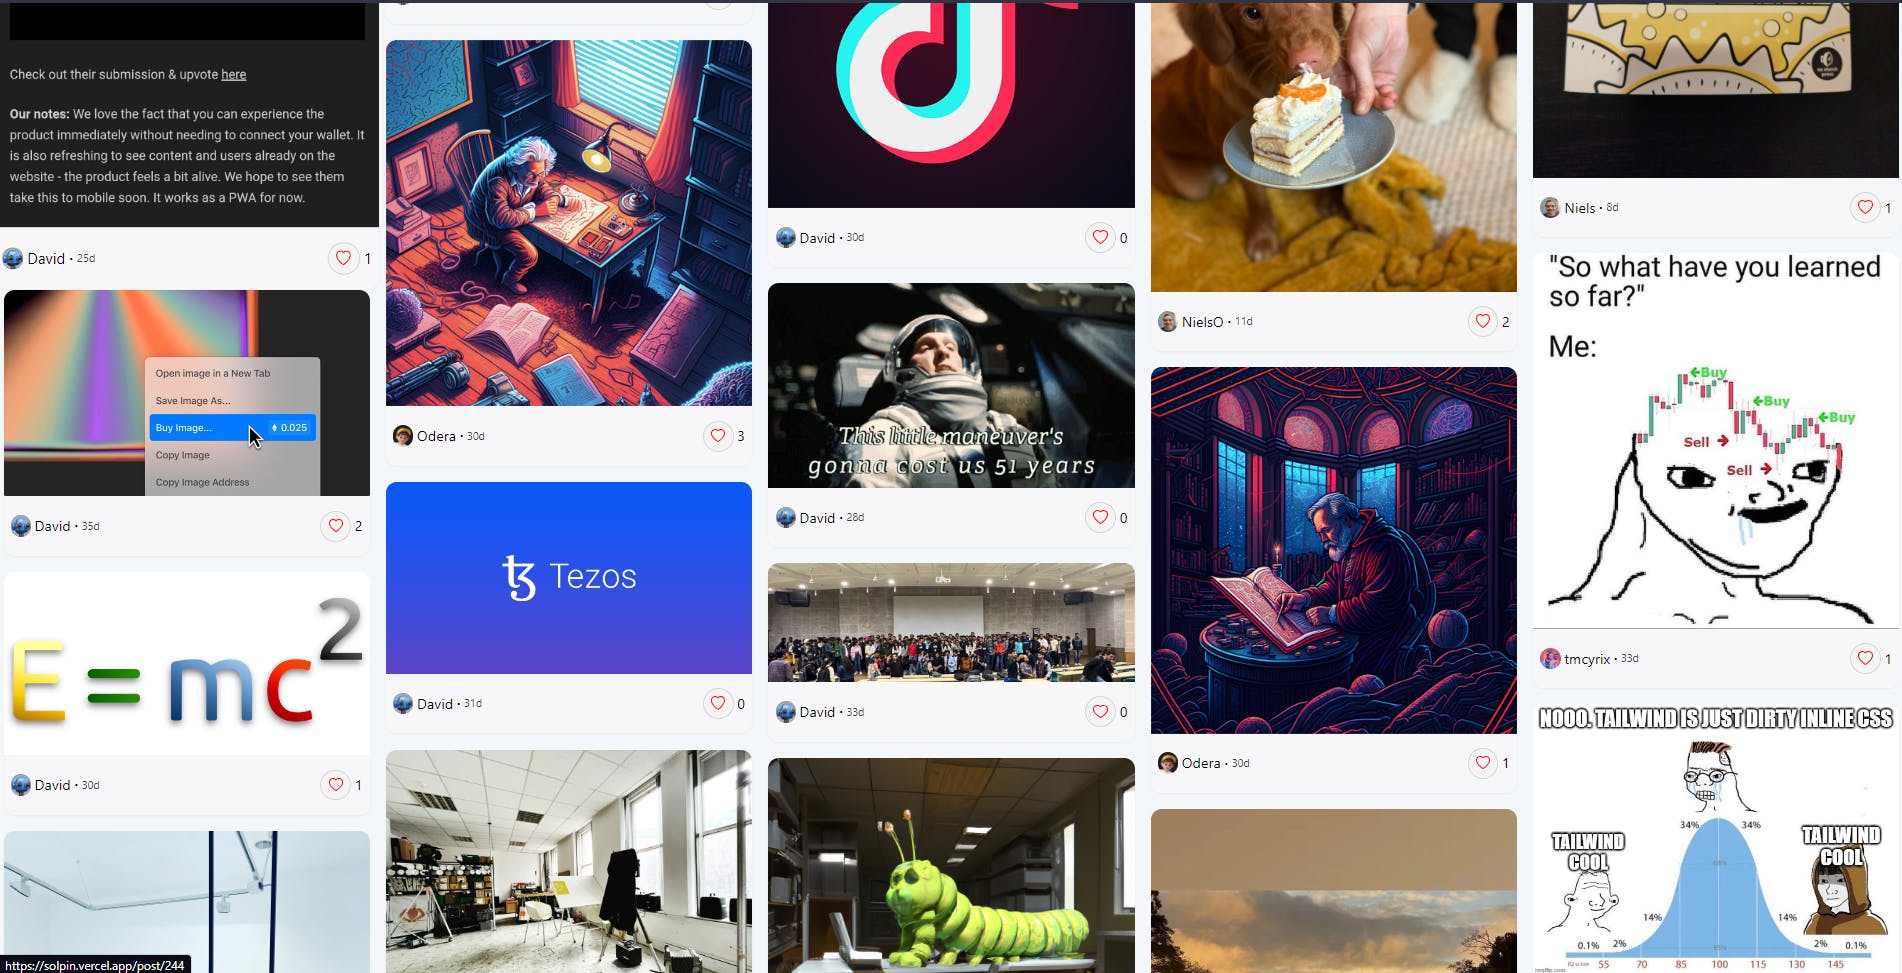
4. Viewing all posts in an App Group
For this tutorial we will simply just show all the content posted in our app on the landing page in a nice Masonry layout just like how Pinterest does.
Firstly install react-responsive-masonry library to make things easier for masonry view. Run npm install react-responsive-masonry
Next let's create a PostCard component that will be responsible fow showing each post in the masonry layout. Create PostCard.jsx in /src/pages/Landing

This is how PostCard.jsx should look like:
import React from "react";
import { Link } from "react-router-dom";
import { timeStampToTimeAgo } from "../../utils/functions";
import { BsHeart, BsHeartFill } from "react-icons/bs";
import defaultPic from "../../assets/default_profile_pic.png";
export default function PostCard({ postValue }) {
  const post = postValue;
  const timeAgo = timeStampToTimeAgo(post.timestamp * 1e9);
  const posterPublicKey = postValue.user.publicKey.toString();
  const totalLikes = postValue.likes.length;
  const isLiked = false;
  return (
    <div className='hover:scale-105 transition-transform duration-300'>
      <div className='flex flex-col w-full shadow-sm border-md  rounded-xl my-1 bg-[#f7f7fa]'>
        <Link to={`/post/${post.postId}`} className='flex flex-col w-full'>
          <img
            src={`${post.media[0].file}`}
            className='w-full rounded-t-xl'
            alt='Post Image'
          />
        </Link>
        <div className='flex w-full py-4 px-2 space-x-1'>
          <Link
            to={`/u/${posterPublicKey}`}
            className='cursor-pointer relative flex items-center justify-center space-x-1'>
            <img
              src={`${post.user.avatar}`}
              onError={(e) => {
                e.target.onerror = null;
                e.target.src = defaultPic;
              }}
              className='w-6 h-6 darkenBg darkenBorder rounded-full'
              alt={`${post.user.nickname}`}
            />
          </Link>
          <div className='flex items-center justify-between w-full'>
            <div className='flex items-center space-x-1'>
              <Link
                to={`/u/${posterPublicKey}`}
                className=' text-base hover:underline'>
                {post.user.nickname}
              </Link>
              <span className='middot' />
              <p className='text-xs text-gray-700'>{timeAgo}</p>
            </div>
            <div className='justify-end flex space-x-1 items-center'>
              <button className='flex items-center justify-center px-2 py-2 rounded-full  border bg-gray-100 border-gray-300 hover:bg-red-200'>
                {isLiked ? (
                  <BsHeartFill size={16} color='red' />
                ) : (
                  <BsHeart size={16} color='red' />
                )}
              </button>

              <p>{totalLikes}</p>
            </div>
          </div>
        </div>
      </div>
    </div>
  );
}
Now we need to fetch all posts from our App's group and show them on landing page.
To do so we will use getAllPosts() function of the SplingSDK that takes two parameters:
GroupID
Number of Posts to fetch
It's also good to make our app so that when the user logs in to our app it checks and shows user's Spling profile if it exists. Else the app should just route the user to /sign-up page where user can create his Spling account
Update the LandingPage.jsx to this:
import React, { useEffect, useContext, useState } from "react";
import { SocialProtocol } from "@spling/social-protocol";

import { Keypair } from "@solana/web3.js";
import PostCard from "./PostCard";
import Masonry, { ResponsiveMasonry } from "react-responsive-masonry";
import toast, { Toaster } from "react-hot-toast";
import { useWallet } from "@solana/wallet-adapter-react";
import Navbar from "../../components/Navbar";
import { protocolOptions } from "../../utils/constants";
import { PublicKey } from "@solana/web3.js";
import { useNavigate, Link } from "react-router-dom";
function LandingPage() {
  const [response, setResponse] = useState(null);
  const [isLoading, setIsLoading] = useState(true);
  const [socialProtocolVal, setSocialProtocolVal] = useState(null);
  const [profileInfo, setProfileInfo] = useState(null);
  const wallet = useWallet();
  const { publicKey } = useWallet();
  const navigate = useNavigate();
  useEffect(() => {
    async function initApp() {
      const socialProtocol = await new SocialProtocol(
        Keypair.generate(),
        null,
        protocolOptions
      ).init();
      setSocialProtocolVal(socialProtocol);
      console.log(socialProtocol);
      try {
        const posts = await socialProtocol.getAllPosts(31, 30);
        const finalResult = [];
        //loop through userPosts and add that post to finalResult only when media's array length is greater than 0
        for (let i = 0; i < posts.length; i++) {
          if (posts[i].media.length > 0) {
            finalResult.push(posts[i]);
          }
        }
        console.log(finalResult);
        setResponse(finalResult);
        setIsLoading(false);
      } catch (err) {
        toast.error(
          `Something went wrong. Please reload the page. ${err.message}`
        );
      }
    }
    if (!response) {
      initApp();
    }
  }, []);

  useEffect(() => {
    async function initApp() {
      const socialProtocolValue = await new SocialProtocol(
        wallet,
        null,
        protocolOptions
      ).init();
      console.log(socialProtocolValue);

      setSocialProtocolVal(socialProtocolVal);
    }
    if (wallet?.publicKey && typeof wallet !== "undefined") {
      initApp();
    }
  }, [wallet]);

  useEffect(() => {
    async function checkUser() {
      const publicKeyObj = new PublicKey(publicKey);
      const userInfo = await socialProtocolVal.getUserByPublicKey(publicKeyObj);
      if (userInfo) {
        setProfileInfo(userInfo);
      } else {
        navigate("/sign-up");
      }
    }
    if (publicKey && socialProtocolVal && !profileInfo) {
      checkUser();
    }
  }, [publicKey]);

  return (
    <div className='w-full'>
      <Navbar shouldShowWallet={true} />
      <Toaster />
      <div className='flex flex-col items-center justify-center'>
        <h1 className='text-4xl font-bold text-gray-800 my-3 '>
          Welcome to My Web3 Social App
        </h1>
      </div>

      <div className='flex flex-col items-center justify-center'>
        {profileInfo && (
          <div className='flex flex-col items-center justify-center'>
            <div className='flex items-center justify-cente space-x-1'>
              <p>Logged In As:</p>
              <div className='ml-2'>
                <div className='text-gray-800 text-sm font-bold'>
                  {profileInfo.nickname}
                </div>
              </div>
              <div className='flex items-center justify-center'>
                <img
                  src={profileInfo.avatar}
                  className='w-10 h-10 rounded-full'
                  alt='profile pic'
                />
              </div>
            </div>

            <Link
              to='/create'
              className='bg-purple-500 text-white px-8 py-2 rounded-md hover:bg-purple-600'>
              Create
            </Link>
          </div>
        )}
      </div>
      <h1 className='text-2xl font-bold text-gray-800 my-10 text-center '>
        Trending Posts
      </h1>
      {isLoading && (
        <div className='flex justify-center items-center'>
          <div className=' ease-linear rounded-full border-4 border-t-4 border-t-blue-500 animate-spin h-12 w-12 mb-4'></div>
        </div>
      )}
      {!isLoading && (
        <div className=''>
          <ResponsiveMasonry
            columnsCountBreakPoints={{ 350: 2, 750: 3, 900: 5 }}>
            <Masonry gutter='10px'>
              {response.map((post, index) => (
                <div className='w-full px-1 mx-auto' key={index}>
                  <PostCard postValue={post} />
                </div>
              ))}
            </Masonry>
          </ResponsiveMasonry>
        </div>
      )}
    </div>
  );
}

export default LandingPage;
The above code does everything for us. On running it, you will now see all posts made in the app in masonry layout
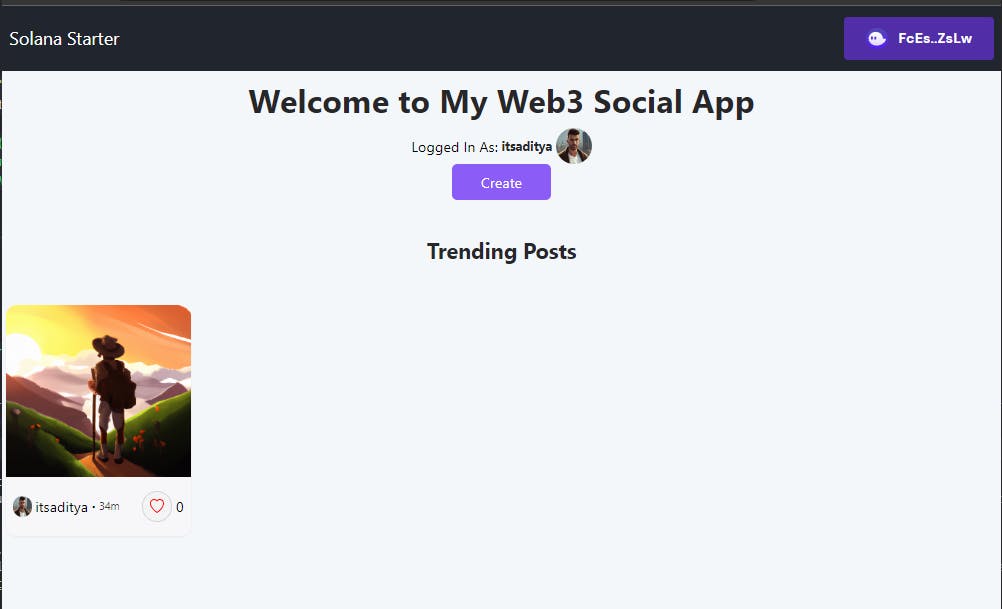
Congratulations! You just made your first ever fully functioning web3 social app on Solana Blockchain 🥳
You can add several other features and pages like comments, post page, user page, like/dislikes etc.
You can get the full repo of the tutorial code here.
Thanks for reading :) Let me know if you encounter some bugs or have any feedback!
And feel free to tip some Solana tokens here: 5cEdbPyYLxYhGzXtBm7NNnma1cm4bVWktRATJM73RzeL