


In the world of blockchain, user private keys are extremely sensitive information. This is because, unlike Web2 password, private keys cannot be modified, which means that if somebody gets a hold of your private key, you're potentially forever vulnerable to an attack and there isn't much you can do unless you move your entire account to another private key. Often times, you might also want your web3 app to perform transactions on the user's behalf directly in your backend. This is where Derived Key comes in play. As the name says, derived keys are "derived" from your original private keys but they can have transaction limits and they expire after specific time period.
In Deso, derived keys have many granular permission which makes it trustless for the end user (assuming that the user knows what he is doing).
To use derived keys, you will have to generate derived key on the client side using the Deso Identity, then pass those keys to your backend where the derived keys will be authorize so that transactions can be made on user's behalf directly on your app's backend.
1. Generating derived keys on client side
The easiest way do this is to use the deso-protocol npm package.
For this article, I am going to use a simple create-react-app for our frontend.
Here is how our App.js should look like
import Deso from "deso-protocol";
import { useState } from "react";
const deso = new Deso();
function App() {
  const [loginResponse, setLoginResponse] = useState();
  return (
    <div>
      <button
        onClick={async () => {
          const payload = {
            transactionSpendingLimitResponse: {
              GlobalDESOLimit: 20 * 1e9,
              TransactionCountLimitMap: {
                BASIC_TRANSFER: 50,
                AUTHORIZE_DERIVED_KEY: 2,
                SUBMIT_POST: 1000,
              },
            },
          };
          const user = await deso.identity.derive(payload);
          console.log(user);
          setLoginResponse(JSON.stringify(user, null, 2));
        }}>
        Derive
      </button>
      <div>
        Login info
        <pre>{loginResponse}</pre>
      </div>
    </div>
  );
}
export default App;
Before proceeding further, let's talk about the payload object passed to deso.identity.derive() method.
Here transactionSpendingLimitResponse is an object that contains all the transaction type limits. GlobalDESOLimit specifies the overall limit of the derived key. GlobalDESOLimit is specified in DesoNanos. In the above example, I am simply limiting the derived key to a maximum expenditure of 20 $DESO. After spending 20 $DESO, the derived keys will no longer function.
After it, TransactionCountLimitMap takes deso transaction types with their counts. This further puts granular limits on the derived key. Here, I only want to make 1000 SUBMIT_POST AND 50 BASIC_TRANSFER transactions with those derived keys.
IMPORTANT NOTE: Always make sure that AUTHORIZE_DERIVED_KEY is set to 2 at least in TransactionCountLimitMap otherwise the generated derived keys won't be authorized in backend. It's a MUST thing.
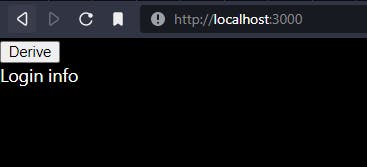
If we run our react app, this is how it will look like for now:
On clicking Derive button, you will see Deso Identity popup like this:

Chose the deso account of which you want to generate the derived keys of.
After it, you will see your derived keys generated on your screen
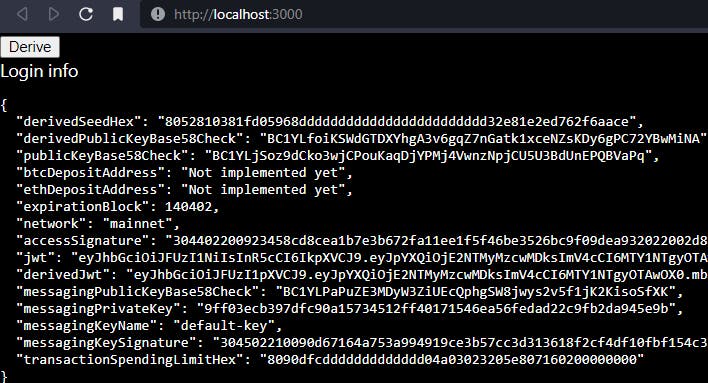
Always make sure that you store these keys privately. I built cordify.app that uses derived keys to perform transactions simply through discord. And for that, I store the derived keys in private database after asymetrically encrypting them.
Now, you can pass the derived keys to your backend and proceed to the next part
2.Authorizing the derived keys.
Everything from here onwards will be done on server instead of client side.
To authorize the derived keys, you only need make a POST request to https://node.deso.org/api/v0/authorize-derived-key with the following JSON payload
{
    "OwnerPublicKeyBase58Check": "<User's original Public Key>",
    "DerivedPublicKeyBase58Check": "<Derived public key of the user>",
    "ExpirationBlock": expiration Block of the derived key,
    "AccessSignature": "<accessSignature of the derived key>",
    "DeleteKey": false,
    "DerivedKeySignature": true,
    "transactionSpendingLimitHex": "<transaction spending limit hex of the derived key>",
    "MinFeeRateNanosPerKB": 1000
}
This will return a JSON response. All you need from the JSON response is TransactionHex. You will then need to sign the transaction using the TransactionHex and derivedSeedHex. Here is code in python through which you can sign any transaction: github.com/AdityaChaudhary0005/DeSo.py/blob... Use Sign_Transaction() method and pass derivedSeedHex and TransactionHex and it will returned signedTransactionHex which you can submit by making a POST request to https://node.deso.org/api/v0/submit-transaction with the following JSON payload
{
'TransactionHex': signedTransactionHex
}
If you were successful in making the submit-transaction request with response 200, you can proceed to the next part!
3. Signing a transaction through derived keys
Signing a transaction involves 4 step process:
- Create a transaction using
OwnerPublicKeyBase58CheckAKA user's original public Key - Append the extraData of the transaction
- get the new
TransactionHexafter appending the extradata and sign it withDerivedPublicKeyBase58CheckandderivedSeedHex - Submit the transaction to the blockchain.
For our use case, let's create a simple post on deso blockchain with derived keys.
Firstly, you will need to create SUBMIT_POST transaction by doing a POST request to https://node.deso.org/api/v0/submit-post
with the following JSON payload
{
    "UpdaterPublicKeyBase58Check": "<Orignal PublicKey of user>",
    "PostHashHexToModify": "",
    "ParentStakeID": "",
    "Title": "",
    "BodyObj": {
        "Body": "This is test post with derived Keys. Thanks @ItsAditya for the article",
        "ImageURLs": [],
        "VideoURLs": []
    },
    "RepostedPostHashHex": "",
    "PostExtraData": {
        "Language": "en"
    },
    "Sub": "",
    "IsHidden": false,
    "MinFeeRateNanosPerKB": 1700,
    "InTutorial": false
}
NOTE: Make sure MinFeeRateNanosPerKB is at least 1700, otherwise the transaction may not be successful as you will need to append the extra data of the transaction as well.
The above post request will return a json response. You need the TransactionHex of the response and make a POST request to node.deso.org/api/v0/append-extra-data` with the following JSON payload
{
    "TransactionHex": "<transaction hex generated by submit-post request>",
    "ExtraData": {
        "DerivedPublicKey": "<derived public key of the user>"
    }
}
The above request will return a JSON response again with a new TransactionHex. You will then use this new TransactionHex and derivedSeedHex to sign the transaction. As mentioned earlier in this article, refer to github.com/AdityaChaudhary0005/DeSo.py/blob.. and use Sign_Transaction() method to sign the transaction with derivedSeedHex and TransactionHex.
After getting the signed Transaction Hex, make a POST request to https://node.deso.org/api/v0/submit-transaction with the following JSON payload
{
'TransactionHex': signedTransactionHex
}
If the above request gives response 200 that means the transaction is submitted to blockchain's mempool!
4. How to deauthorize derived keys
There are two ways. Firstly, you can use the same authorize-derived-key endpoint and set DeleteKey to true in the JSON payload and do the same previously mentioned steps. But this method makes no sense since the end user is being dependent on your app to de-authorize the derived keys. The user should instead be able to view and manage all his derived keys at a place where they can de-authorize it without trusting any service!
Currently, the npm package of deso-protocol doesn't has a way for the client to de-authorize the derived keys, but you can refer to this pull request to learn how you can use Deso Identity to de-authorize any derived key: github.com/deso-protocol/identity/pull/131
On a side note, I am already building a derived key manager tool on desohive.com using which any user can manage their derived keys!
ALERT: If this article doesn't work even after following the exact same thing, it means Deso core team made backend changes and broke all the apps.
If you liked this article, don't forget to follow me on twitter.com/AnonymAditya and support me on diamond at diamondapp.com/u/ItsAditya